Blockset described on this wiki is deprecated since 2012.
For Model Based Design (MBD), use the free MPLAB Device Blocks for Simulink, tool from Microchip.
Updated Rapid Control Prototyping (RCP) custom projects are published at: https://lubin.kerhuel.eu.
Explorer 16 Board
Acknowledgement: Thanks to Microchip® for Providing the Explorer 16 Development Board with the REAL ICE programming system
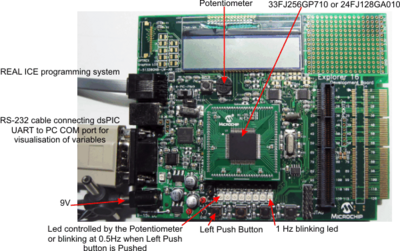
This example use the Explorer 16 Development Board with the dsPIC 33FJ256GP710 or the PIC 24JF128GA010 microcontroller. The model file is in the blockset install directory : examples\dsPIC_33f_Explorer16.mdl
This model, with the dsPIC blockset, do :
- One led blinking at 1Hz (Port A0)
- One led (Port A7) :
- blinking at 2Hz when the left button is pushed (Port D6)
- Switch on or off depending on the position of the potentiometer (Port AN5)
- Low pass Filtering sample value from the potentiometer (at 1Hz and 10Hz)
- Logging and Plotting with Matlab and in real time the raw and filtered samples from AN5 : Potentiometer
Contents
Set UP
Simulink
- When starting from scratch, you must configure the simulink compiler:
- Simulation ==> Configuration Parameters (Ctrl-E)
- In the Real time workshop pannel, browse the System Target File and select 'dspic.tlc'.
If you do not have 'dspic.tlc' in the list, the blockset is not properly installed. Download the last demo version and install it.
- Add the 'Master block' from the 'Embedded Target for Mircochip dsPIC' library.
- We set the model Time Step to 5ms:
- Simulation ==> Configuration Parameters (Ctrl-E)
- In the Solver pannel, set the fixed Step size to 0.005 (s).
PIC
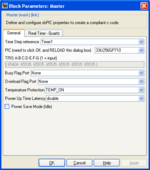
Open the Master block.
- First, Select the dsPIC used. Select the 33fj256GP710 (Selected by default) (This ship is provided with the Explorer 16 board).
You can also select the PIC 24fJ128GA010 which is also provided with explorer 16 board and which has been tested. You could also use any other PIC. If the PIC target is modified, the model must be updated before compiling, or it must be compiled twice.
- The dsPIC timer 1 will be used to set the main time step of the model. ( defined previously to 5ms in simulink).
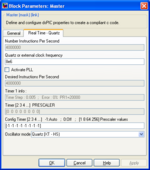
In "Real Time - Quartz" Tab, We set the oscillator mode to Quartz (XT-HS) and we set the Quartz to 8MHz. The quartz of the Explorer 16 board is 16MHz. We do not use the PLL here. If you wand to use the PLL, check it and set in the "Desired Instructions Per Secondes" the MIPS you wand. All Prescaler and PLL multiplier will be set automatically to achieve this desired MIPS. Verify however MIPS achieved in "Number Instructions Per seconds".
- All Timer will be configured automatically (-1)
Set up PIC peripheral
Digital Input (Push Button) and Output (Blinking Led)
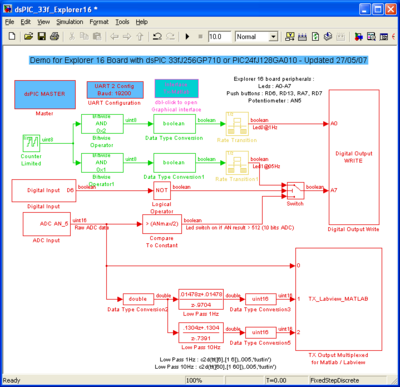
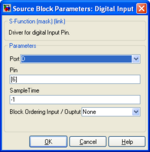
- The Digital Input block's output value is 0 while the button is pushed. The diagram make the LED blink when the button is pushed.
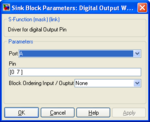
- The Digital Output Write block switch on or off Leds connected to the PIN A0 or A7 of the dsPIC depending on the block's input values. The refresh rate of this block is 200Hz (5ms : Red).
Analog to Digital Converter (ADC for potentiometer)
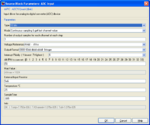
Potentiometer is connected to the AN5 PIN. We used here the 10 bit ADC converter of the dsPIC but we using the 12 bits ADC is possible and switching from one to the other is as simple as selecting which one you want to use (one click solution !).
The value converted is an unsigned 16 bit variable where only the 10 lower bites are used. The block create the variable 'ANmax' in the workspace that has the value of the max value taken by the output of the block. If using the 10bit ADC, the max value is 2^10 = 1024. When using the 12 bit ADC, the max value is 2^12 = 4096.
The output value of the ADC block is compared to ANmax/2 that is the mid position of the potentiometer (corresponding to a tension of 1.65V). When the value converted is greater than ANmax/2, the led connected to the port A7 switched on otherwise it is switched off.
UART
Data transmition is done using the UART dsPIC peripheral and one PC serial COM port. The demo board RS-232 serial port must be connected to one COM port of the PC.
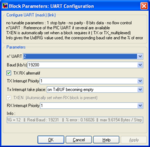
First of all, the baud rate of the UART must be set. For each baud selected, the Info text box show the real baud obtained the % error from the selected baud. The % error must be low (absolute value of error belo 3%) for the RS-232 serial transmition to work properly. Using a 8Mhz quartz with no PLL (obtaining 4 MIPS) the fastest workable baud rate is 19200.
The UART port of the board with the appropriate max3232 component is connected to the UART 2 of the dsPIC.
Functions
Blinking Leds
A counter is used to make blinkind leds. Its sample time set to 1 for 1 seconde makes it count at 1Hz. The model has blocks with a sample time of 5ms (model main sample time) and others with 1 seconde (which is a multiple (X200) of the model sample time). Thus, this is a multirate model. Color are used to see the different sample time (option in Format==> Ports/Signal display ==> 'Sample Time Color' .
- Red blocks have a sampling rate of 5ms (200Hz)
- Green blocks have a sampling rate of 1s (1Hz)
The counter is configured to count from 0 to 3. Bitewise logic and extract bit 0 and bit 1 of the counter. These bits are sent to the Digital Output Write bock.
Note : We could use two separate blocks : one for the port (A0 ) with a refreshing rate of 1Hz and another one for the third led (connected to A7) with a refreshing rate of 200Hz.
Filtering
The output value of the ADC block is also filtered with two different filters. One first order filter with a frequency cut off at 1Hz designed with the matlab command line
>>c2d(tf([6],[1 6]),.005,'tustin'); %(need the Control System Toolbox)
and one first order filter with a frequency cut off at 10Hz designed with the matlab command line
>>c2d(tf([60],[1 60]),.005,'tustin')
The matlab filter block used works using double data type. It needs double data types at its input and provides double data types at its output. Two conversion blocks are used. Note however that calculation using double are time consumming for the dsPIC and it is preferable to realize fixed point filter. The fixed point toolbox is very helpfull to make precise and efficient calculation using only fixed point variables.
Compile the Simulink to obtain the .hex / .elf file
Once the model is done, C code is generated and compiled : click on the 'Incremental build' button or press 'Ctrl+b'. The .hex file obtained in the same directory of the. mdl file can be loaded into the dsPIC using MPLAB : go to MPLAB, File==> Import and select the .hex file, then, download it into your dsPIC using either ICD2, Real ICE or others...
html report with the C code generated can be generated. Go to Simulation ==> Configuration Parameters ==> select Real Time Workshop on the left column and check the option Generate HTML report on the right pannel. The model was compiled with Matlab 2007.
| dsPIC 33FJ256GP710 | 24JF128GA010 |
|---|---|
| [Report] | [Report] |
| [Hex file] | [Hex file] |
Log and Plot Data
Pic side
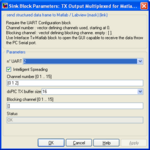
Once the UART is configured, the block to send data from the dsPIC to Matlab is configured. We set 3 channel to send 3 different data. At low level portocol, the three data are uint16 and needs 3 char each to be sent. All data will be logged since at each time step, 9.6 char can be sent and 9 are required (3X3). Data will be logged with the same sampling rate than the block : 200Hz. It is possible to use more channel but this will lead to data loss (not important for visualisation or debugging).
Once the model is generated, compiled and the .hex file is loaded into the dsPIC, data will be logged and view with the matlab User Interface created. This one can be opened either in double clicking onto the block 'Interface Tx-Matlab' or typing at the matlab prompt >> rs232gui
Computer side
Once the .hex file is loaded into the dsPIC, you get two led blinking at 1Hz and 0.5Hz and the Explorer 16 Demo board is connected to one PC COM port.
Open the rs232gui user interface ( click twice on the block 'Interface Tx-Matlab' or type rs232gui at the matlab prompt.
Set the COM port to the one you are using (PC side) and set the baud rate to 19200 (same as dsPIC). No flow control used. Then,click on Connexion, wait 3 seconds and click on the Start button. On some PC, Matlab closed if you click on Connexion while data are being sent from the dsPIC to the PC. In that case, disconnect the dsPIC before pushing the Connexion button.
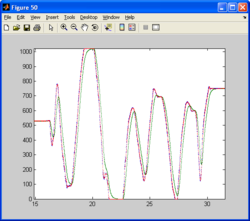
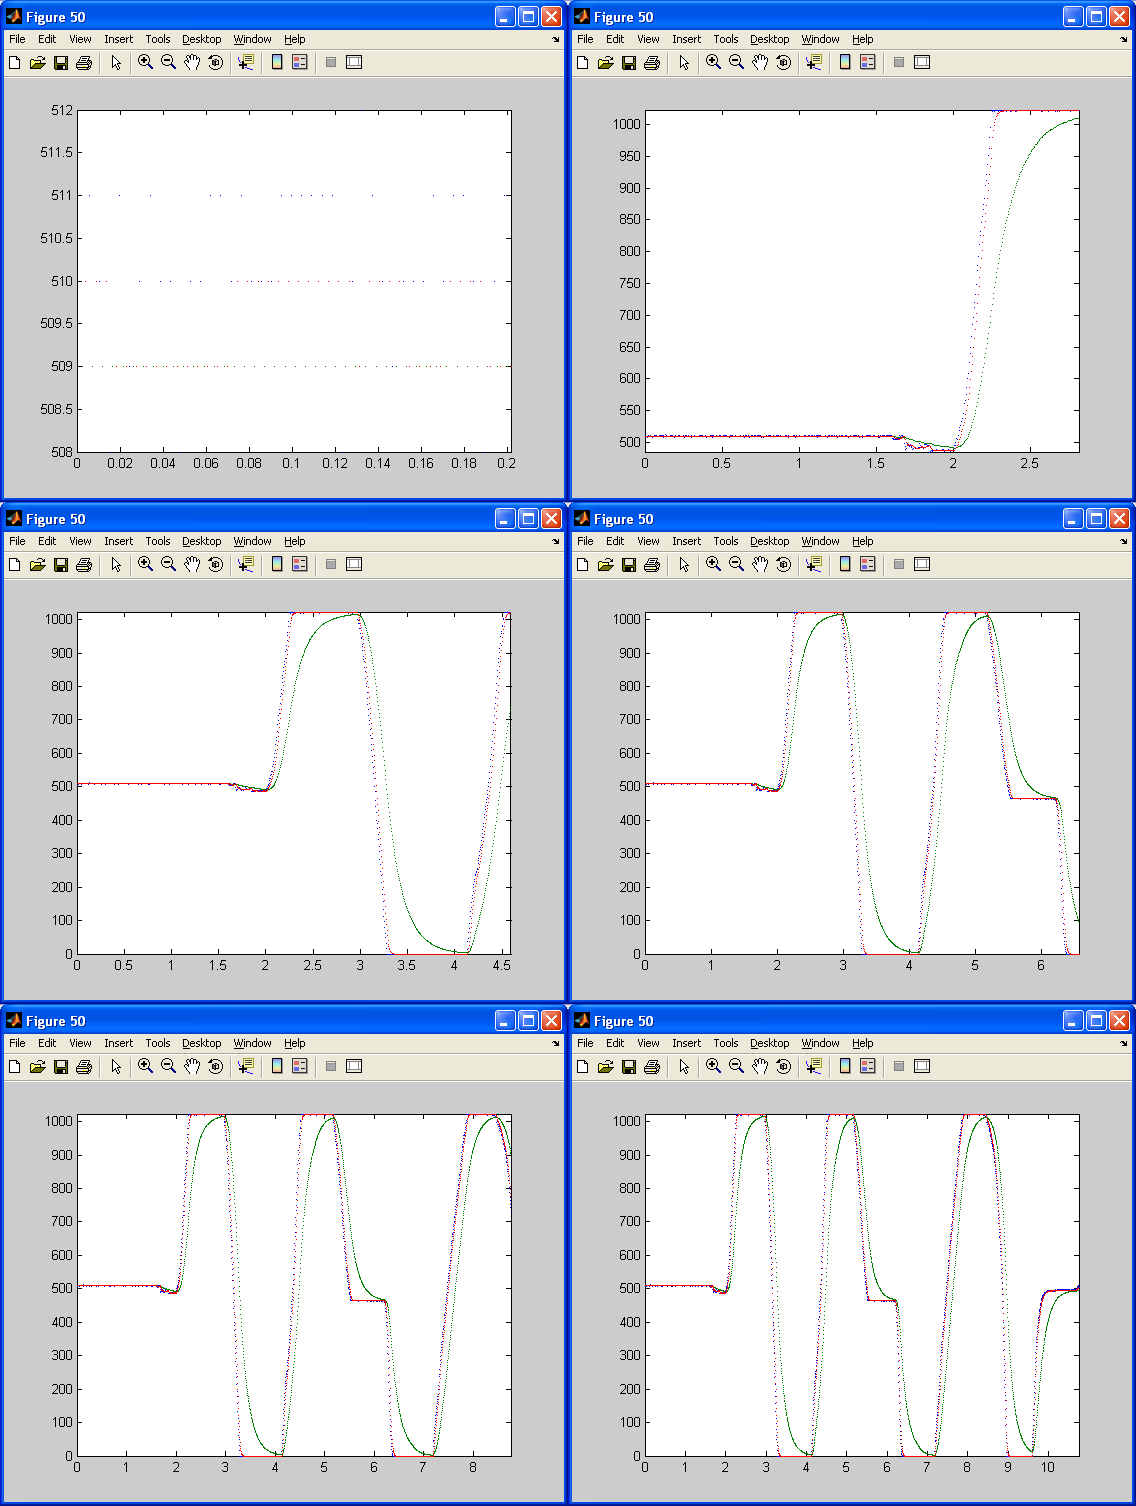
Moving the Potentiometer, you will obtain the following graphic with three curves : the blue curve is the raw data (unfiltred), the red curve is the data filtred at 1Hz and the green curve is the data filtered at 10Hz.
